
Tips on Cleaning Different Materials in the Kitchen - 4
Although these tips have been tried and tested, we would like to point out that they should be carried out with
caution and used at your own risk, we are not liable for any claims, or damage, arising from using the remedies.
Please check with your kitchen supplier/manufacturer first, guarantees can be invalidated if the correct advice isn′t taken.
It is always safest to take any manufacturers advice foremost.
Before trying out any of the remedies, experiment on an area hidden away, not on direct view, first.
If you feel that you have a good tried and tested tip to offer others and would like to contribute to this page,
please send your tip to us via our contact page and we will endeavor to include it at a later date.
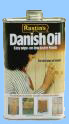
Treating and Cleaning Timber Worktops - continued:
Finishing:
12 hours after the last oiling sand the worktop lengthways (in the direction of the staves) with a fine but non-abrasive sponge (grit 180-220) and remove the dust. Afterwards, oil the worktop again. Let this soak in for 30 minutes and again, with a dry clean cloth, wipe away any excess oil to avoid blotches. The treatment should be repeated within the next 6 - 8 hours. 24 hours after last treatment. For the best results, and to increase the top′s resistance to water penetration, treat the work top every other day for the first six days, and then every third day until the worktop is saturated (approximately eight weeks). The worktop needs then only to be treated as required.

If using Hardwax-Oil (high solid) a slightly different finishing method should be used. To apply, use either a rag or a brush. Hardwax-Oil is ready to use. Apply the 1st coat thinly to both faces and all edges (including sink/hob cut outs) and leave to dry overnight (at least 8 - 10 hours) allowing good ventilation. Apply 2nd coat thinly as above. Remove eventual surplus immediately. Leave to dry at least 8 - 10 hours. Apply one final coat of Hardwax-Oil to the face only. The surface will harden within 2 - 3 weeks.
 As a natural product, splits and shakes can occur in all species of timber. These can be exaggerated or caused when a worktop has been exposed to excessive moisture from sinks, over-filled kettles, spillages not wiped up promptly or through improper maintenance. Excessive heat will also cause splits or shakes to appear.
If you accidently drop a heavy item and dent the worktop, it can be removed by wetting a clean cloth and carefully iron (using the small tip) on a hot setting over the dented area. For deep dents try several times and eventually the bruised area will lift back up to the original level.
For maintenance of tops finished with Hardwax-Oil; for daily cleaning, use a damp cloth with diluted washing up liquid and wipe dry as usual. For heavier stains and regular maintenance, Liquid Wax Cleaner is recommended.
Cleaning Glass (Including glass kitchen worktops):
The easiest of all - use glass cleaner such as Windowlean.
Use a dry cotton towel instead of paper towels or newspaper. Many smudges can simply be wiped off with a clean, dry towel, but if the smudge is greasy, spray it with window cleaner, then wipe off with a dry towel. There′s no need to clean an entire surface just to remove a smudge or two.
Use a razor-blade scraper to remove paint, glue or adhesive from glass. Wet the surface first, then scrape in one direction to avoid scratches.
Cleaning Stainless Steel:
Water-borne deposits clinging to the steel surface cause discolouration and cause most marks on stainless steel. Such stains known as the “rainbow effect” can be avoided by removing wet cloths, containers etc. Cleaning stainless steel is simple; just wipe with undiluted vinegar on a dampened cloth! You should find that any little stains on the stainless steel will be dissolved by the vinegar. Also use vinegar to lift limescale from waste outlets and overflows, leave it to act before rubbing.
After rubbing and washing with warm soapy water, you will finish with shiny stainless steel. To remove grease marks and clean brushed stainless steel, wipe with baby oil on a paper towel, this makes it look just like new.
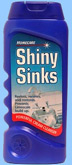
Stainless steel will always scratch, and because of the directional polishing marks on many sinks, scratching may show up quite dramatically initially. However, with regular use and perodic cleaning (such as using "Shiny Sinks" cleaner) the stainless steel will build up a patina over the years and the scratch marks will become progressively less visable.
One of the best products on sale for cleaning stainless steel is “Bar Keepers Friend” or “Shiny Sinks” which is available from most supermarkets, "Bar Keepers Friend" should be sprinkled onto the sink and worked into a paste with a stiff nylon brush - not a cloth or washing up brush - before the sink is thoroughly rinsed and dried, finish by applying “Shiny Sinks”.
All our sinks are made from premium quality 304 austenitic 18/10 chrome/nickel steel, which is metallurgically incapable of rusting or corroding under normal household conditions.
Please Note: stainless steel can sometimes harbour ferrous (iron based) particles from the water supply, especially during or immediately after new installations, where pipework (particularly old iron pipes) have been disturbed.
Filings are deposited on the stainless steel sink surface, where they will cling, and then rust, unless removed.
Cleaning Chrome Taps:
Clean with a neutral detergent, rinse well and then buff with a soft lint-free cloth until dry. If the chrome has a build up of Limescale, pour some white vinegar over the area to be cleaned, or wrap vinegar soaked kitchen tissue around, or cover with a vinegar filled plastic bag to allow the vinegar to work. Leave for a couple of hours then rinse thoroughly and your taps will look as good as new.
For more stuborn stains use two tablespoons of vinegar with one teaspoon of salt.
Cleaning the Refrigerator:
To keep the fridge clean wash out with detergent, rinse well and deodorise using bicarbonate of soda in the final rinsing water. Pay particular attention to the rubber seals on the doors, cleaning in the folded edges.
After cleaning out the inside, if it is a free-standing ′fridge don′t forget to pull the appliance out and clean underneath, also cleaning the external casings of the fridge. Not just the inside.
Keep stored food in containers, and keep these containers clean - inside and out. Do not store cooked food in contact with raw food. This is where most cross-contamination occurs. Always keep the fridge at the manufacturers recommended storage temperature.
To keep smells out of fridge use bicarbonate of soda. Fill a small jar with perforated lid with the soda and cover with some cotton material or gauze. Another easy way to rid your refrigerator of unpleasant smells is to place a few USED tea bags at the bottom of the fridge. Leave overnight, and the next day the smell will have gone, simple but effective!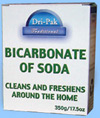
Cleaning the Oven:
To cheaply remove really tough stains in the oven, consider a mix of baking soda and water, left on the stain for a few minutes before rubbing away.
Cleaning the Microwave:
Clean the microwave interior using a clean cloth and a very small amount of washing up detergent if there are stuborn stains. Rinse the cloth and remove all traces of detergent. Dry with a clean lint free cloth. To eliminate cooking smells lingering in your microwave, put half a lemon in a bowl of water and heat for a few minutes on low power.
Cleaning Aluminium:
Aluminium is a soft metal, but it cleans easily, you can use scouring pads on it providing they are fairly fine.
Soak or wipe aluminium in a detergent solution, rinse well and dry quickly. Aluminium which is left to dry tends to leave water marks.
Always take care to read the manufacturers instructions supplied for the particular appliance - before attempting to clean.
What you cannot use on aluminium is a caustic detergent of any kind, it reacts with it
and you will find that your nice aluminium turns black and pitted and is ruined beyond repair.
Cleaning the Sink Drains:
It is always best NOT to pour fat down a drain as it can solidify and block pipes, this can prove to be very costly to remove when the plumber is called out. Try mixing the fat (not meat fat) with cheap porridge oatmeal, you can always mix a few nuts and dried fruit, let it set hard and put out for the birds. This only works for fat not oil, as oil remains a liquid. If you have managed to block the drain, firstly remove as much water as possible, try mixing a large amount of Bicarbonate of soda with some boiling water and slowly pouring down the drain. Always wear safety goggles before attempting these tips.
Please contact us to discuss your requirements.
